Conservatory roof replacement takes 3 to 5 working days for standard residential properties. A small conservatory (3m x 3m) typically finishes in 3 days. Medium and large conservatories (4m x 3m and above) require 4 to 5 days. This timeline includes removal of the old roof, structural framework installation, insulation, external covering, and internal finishing. The space remains weatherproof from day 1 onwards. Read our full guide to conservatory roof conversion to understand the complete process from survey to handover.

What Happens on Each Day of Installation?
Every conservatory roof replacement follows a structured process. Here is the day-by-day breakdown:
Day 1: Removal and Preparation
The team arrives at 8:00 AM. The existing conservatory roof panels - polycarbonate, glass, or old tiles - are carefully removed and disposed of responsibly. The existing framework is assessed. If the existing bars and glazing bars are sound, they remain in place. Damaged sections are replaced. By the end of day 1, the old conservatory roof is gone and the structure is prepared for the new system. A temporary weatherproof membrane protects the space overnight.
Day 2: Structural Framework
The new roof framework is installed. Lightweight aluminium or timber sub-frames create the pitch and structure. For tiled conservatory roof systems, battens are fixed at precise spacings to support the tiles. For solid panel systems, the structural deck is secured. All framework meets building regulations for load-bearing capacity. The conservatory begins to take shape with its new roofline visible from outside.
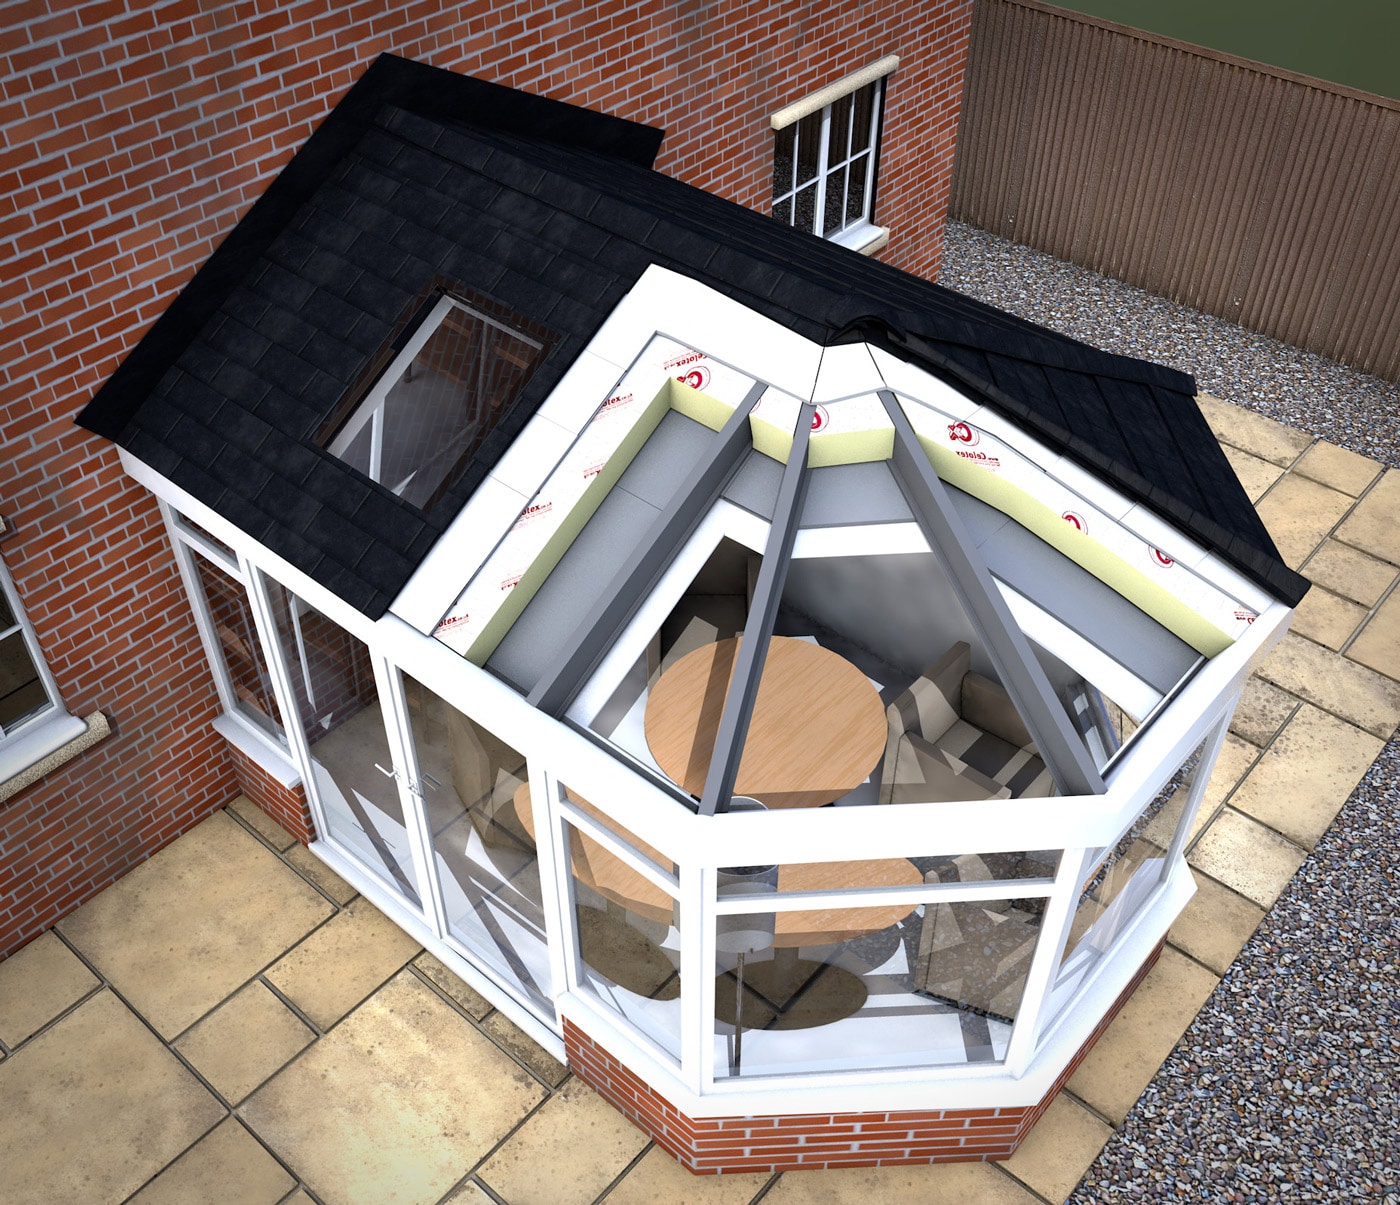
Day 3: Insulation and Thermal Layers
High-performance insulation is installed between the framework. Rigid PIR (polyisocyanurate) boards with foil backing deliver U-values of 0.15 to 0.18 W/m2K. A vapour barrier prevents condensation. The insulation layer is the element that transforms the conservatory from a seasonal space into a year-round living space. Building control inspectors often visit at this stage to verify insulation depth and coverage.
Day 4: External Covering and Weatherproofing
Tiles, panels, or the chosen external finish are fitted. For tiled conservatory roof systems, composite tiles are laid from eaves to ridge. Ridge tiles and hip tiles are bedded and pointed. Flashings are installed where the new roof meets existing walls. Guttering and downpipes are connected. By the end of day 4, the exterior is fully weatherproof and the conservatory roof replacement is visually complete from outside.
Day 5: Internal Finishing
Plasterboard is fitted to the internal ceiling and skimmed for a smooth finish. LED downlighters (typically 4 to 6 units) are wired and installed by a qualified electrician. uPVC trim and skirting details are added. The space receives a final clean. Building control conducts their final inspection. The room is ready for use as a year-round living space immediately.
What Factors Affect the Conservatory Roof Replacement Timeline?
Six factors influence the total duration of a conservatory roof replacement project:
- Size: A 3m x 3m conservatory takes 3 days. A 5m x 4m conservatory takes 5 days. Each additional square metre adds approximately 2 hours to the total installation time.
- Roof shape: Victorian (faceted) and P-shaped conservatories take 1 day longer than lean-to or Edwardian (rectangular) designs due to additional hip joints and cutting.
- Structural condition: If existing walls need reinforcement or the ring beam requires replacement, add 1 day to the timeline.
- Material choice: Solid panel systems install 1 day faster than tiled systems because panels cover larger areas than individual tiles.
- Weather: High winds above 40 mph prevent safe roof work. Heavy rain delays external tiling. Our scheduling accounts for Liverpool weather patterns, and we book buffer days during winter months.
- Internal requirements: Plastered ceilings with lighting take a full day. Basic plasterboard without skim finish reduces this to half a day.
How Do You Prepare for a Conservatory Roof Replacement?
Preparation takes 30 minutes and ensures the team works efficiently from day 1. Complete these 5 steps before the installation date:
- Clear the conservatory: Remove all furniture, plants, and personal items. The team needs full access to the floor area and walls.
- Protect adjacent rooms: Close internal doors to prevent dust entering the main house. We use dust sheets, but additional protection helps.
- Ensure garden access: The team brings scaffolding, materials, and tools through the garden. Clear a path at least 1.5 metres wide to the conservatory.
- Arrange parking: Our team arrives with a large van. Reserve a parking space close to your property for the duration of the work.
- Notify neighbours: The removal and installation process generates noise during working hours (8:00 AM to 5:00 PM). A brief heads-up maintains good relations.
What Can You Expect During the Process?
The conservatory is unusable during installation. The rest of your home functions normally. Our teams use external access for most work, minimising internal disruption. Electricity and water remain connected throughout. Dust is contained using protective sheeting.
A project manager checks in daily. You receive updates on progress and any adjustments to the schedule. Building control inspections happen during working hours - we coordinate these directly so you do not need to arrange them.
The final handover includes a walkthrough of the finished space, demonstration of any lighting controls, and copies of all building regulations paperwork. Your conservatory roof replacement is ready for immediate use as a year-round living space.
For a detailed breakdown of investment and pricing, see our conservatory roof replacement cost guide. Book a free survey to get an exact timeline for your property. Call 0151 453 9786 or request a free quote online.